
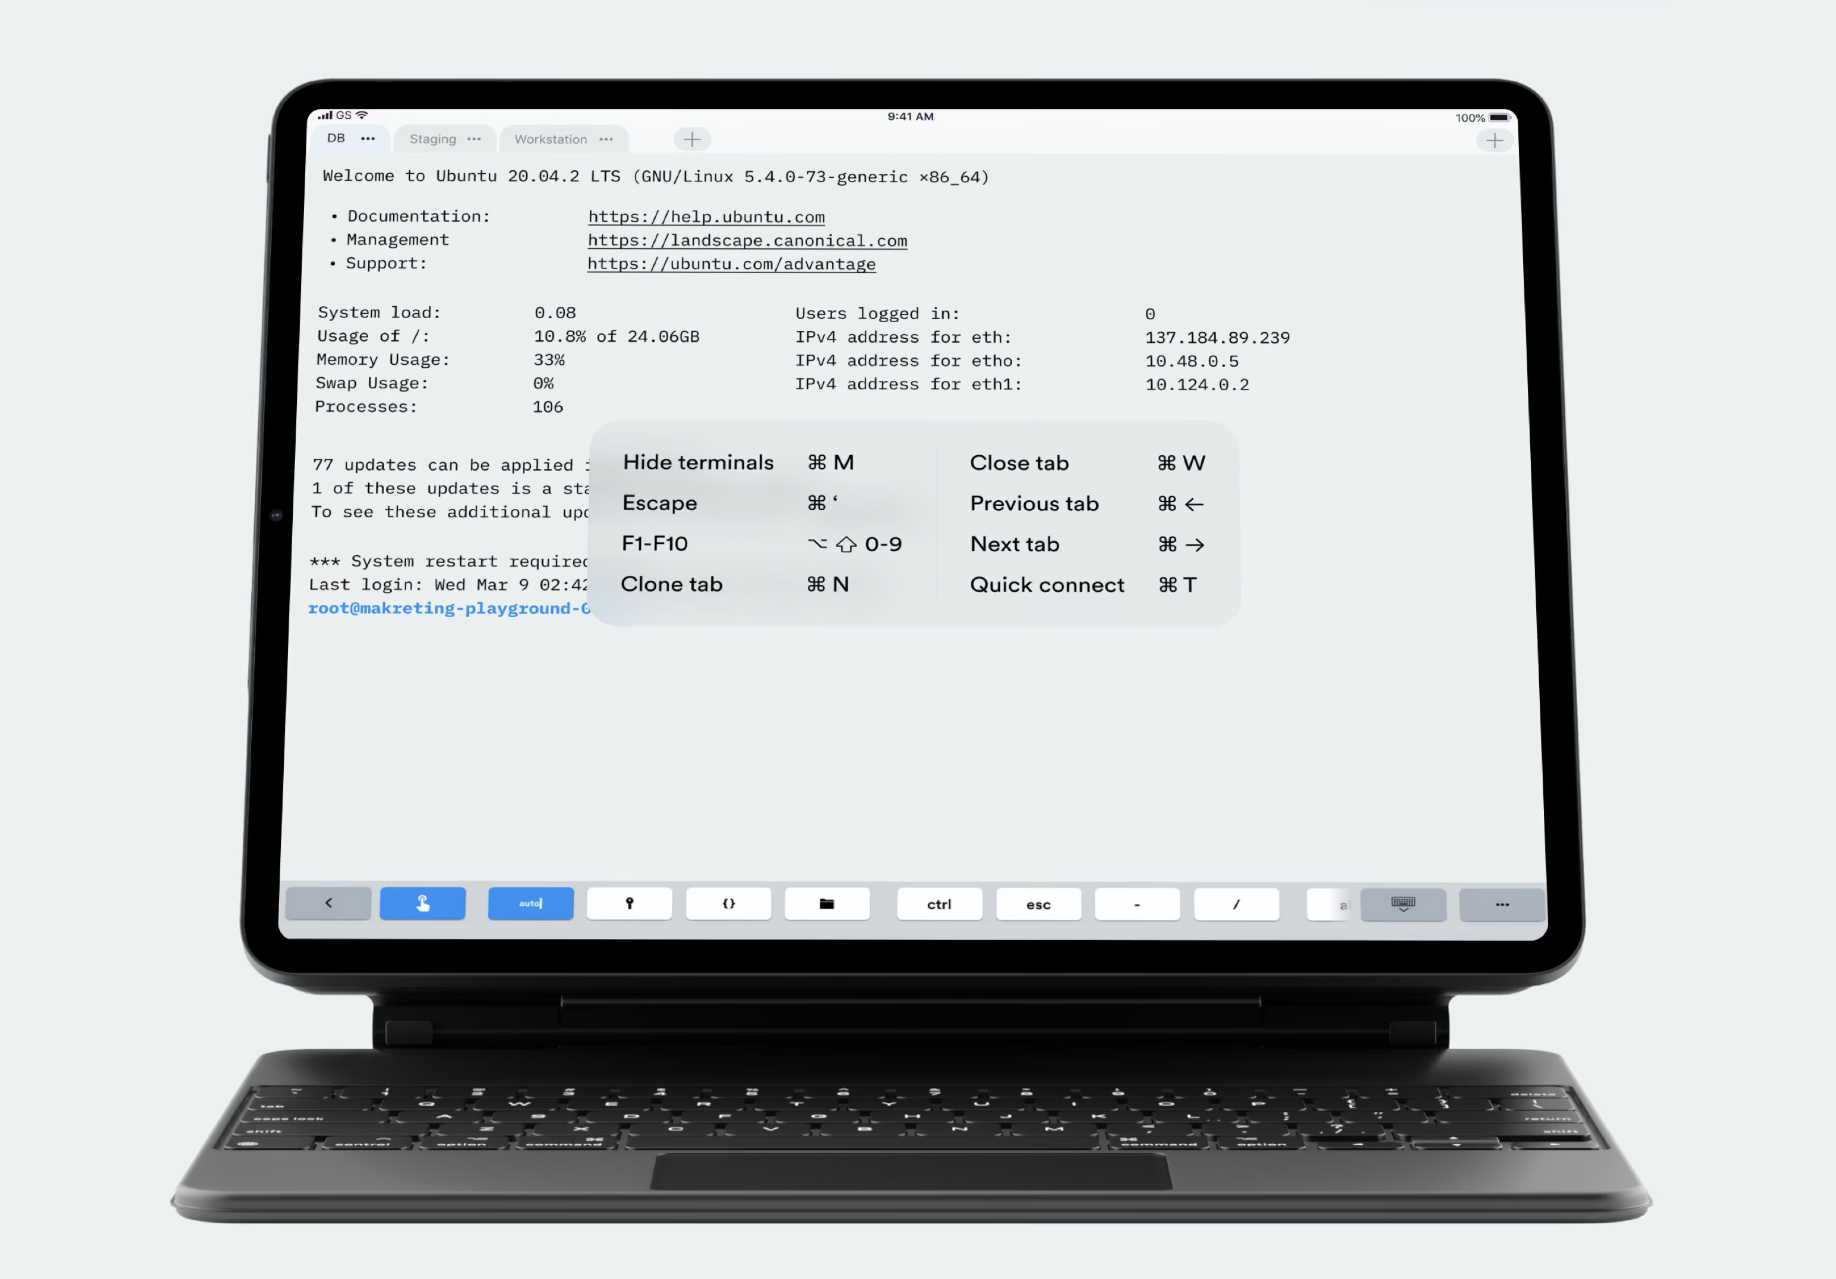
A practical guide to using ZeroTier virtual networking with terminal emulators on mobile devices, so tablets and phones can be used as remote productivity terminals.
Building a Remote Mobile Productivity Tool with ZeroTier NAT Traversal and Terminal Emulators
Recently, I have been looking into NAT traversal and searching for traversal tools. Many recommendations online point to ZeroTier for virtual networking, so I decided to give it a try. The tool is free and essentially provides fool-proof networking, making it very convenient. Although its servers are located overseas, resulting in somewhat slower speeds, it is more than sufficient for SSH or FTP. Moreover, I recently discovered that ZeroTier also has mobile clients, which means that with a terminal emulator on a mobile device, remote development work becomes entirely feasible!
Basic Usage of ZeroTier
Register / Create a Virtual LAN
Visit the ZeroTier Official Website, register an account, and log in. Once logged in, you will see an interface like the one below:

- Click [Create A Network] at the top, and a new virtual LAN will be created in the Network list below. Click on it to enter the network settings interface.
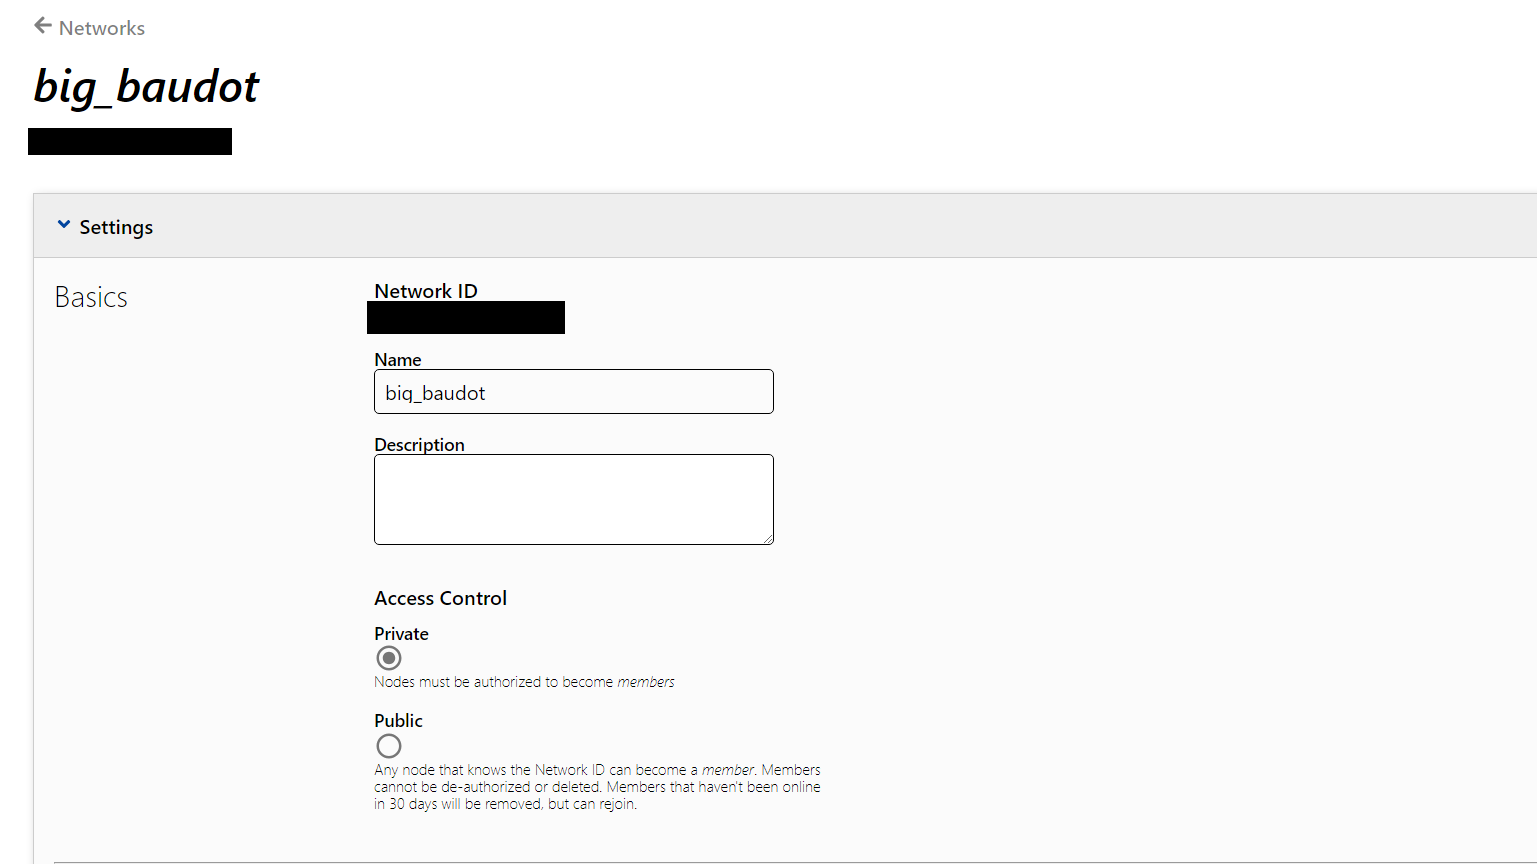
- In Basic settings, you can modify the network name, description, and privacy settings. It is recommended to set it to Private; after all, you don't want unauthorized access to your virtual LAN. The information required for connecting is the Network ID field.
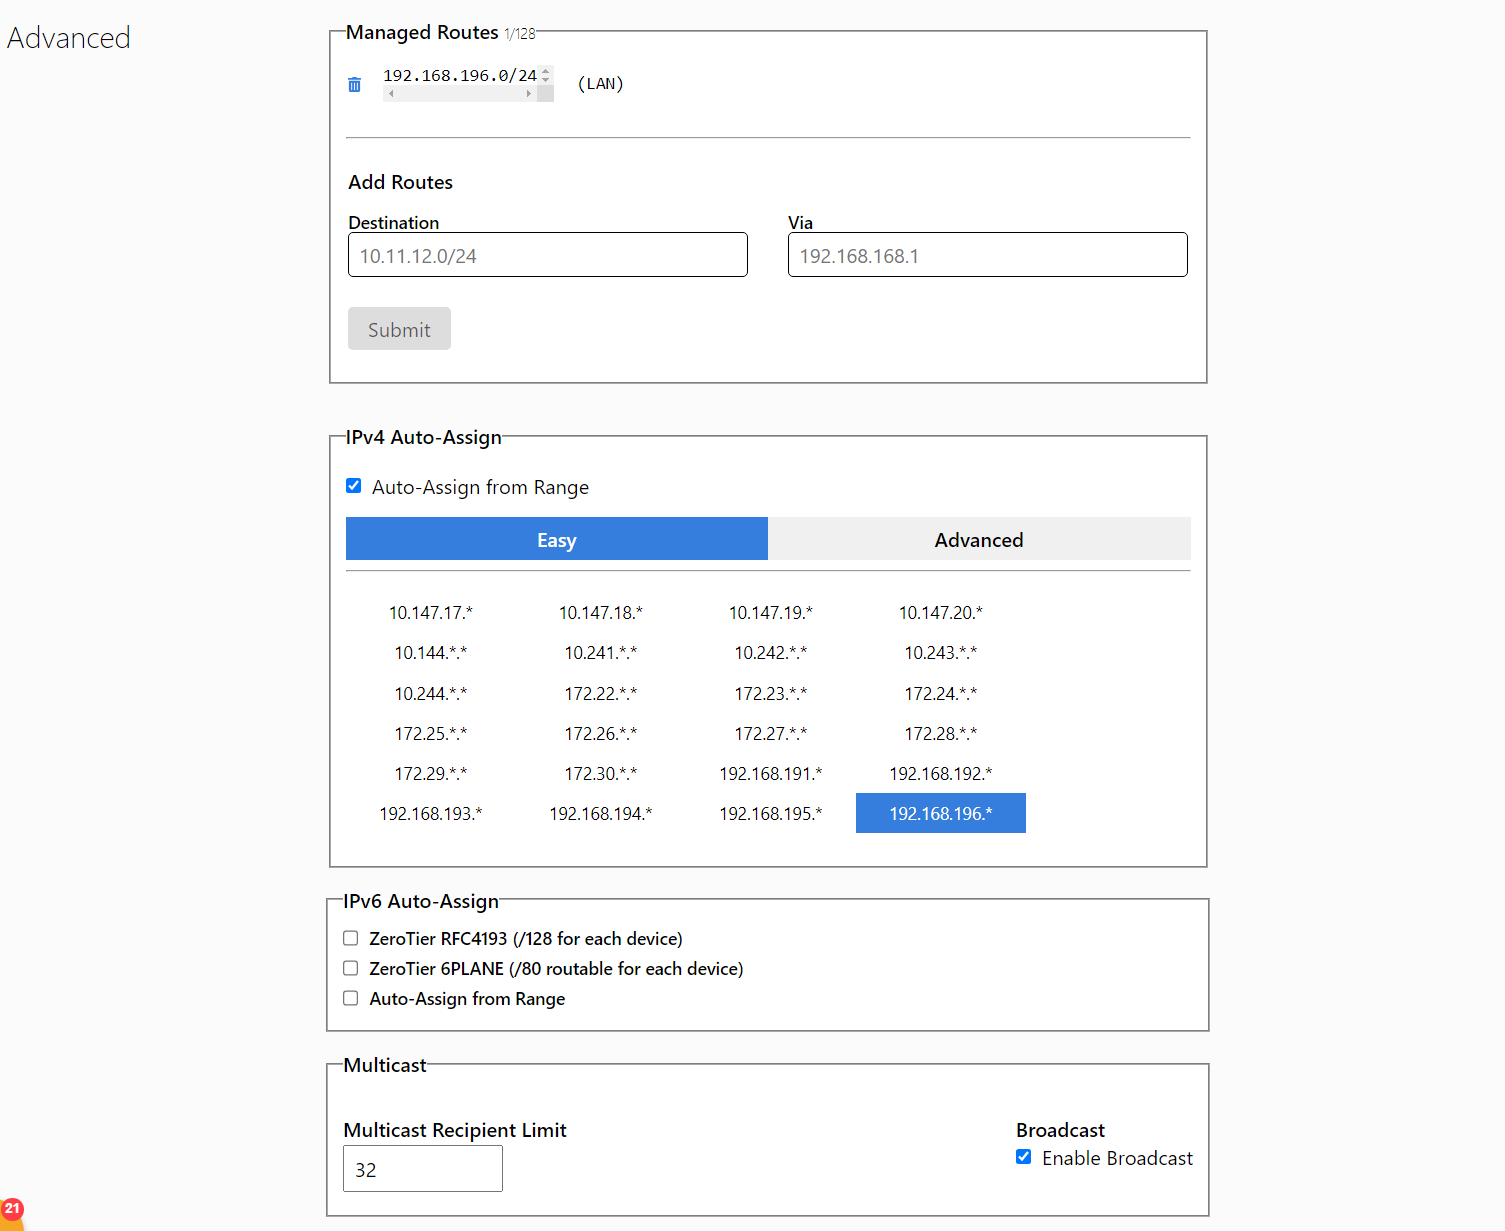
- Next is the Advanced settings section. Here, you can configure subnet IP ranges, routes, and other details according to your preference. If you want to keep it simple, just select a memorable LAN address prefix in the IPv4 Address section and leave the rest as default.
Install the Client on Target Devices and Join the Network
1. Desktop
The client referred to here is zerotier-one. The official download page provides installation methods for various platforms. Our remote development server is typically a Linux system; you can download the corresponding package manually or install it using your system's package manager.
1 |
|
macOS and Windows use clients with graphical user interfaces (GUI); simply download and run the corresponding installer.
Start the Service and Join the Network on Linux
- First, start the zerotier-one service using your system's service manager:
1 |
|
sudo systemctl status zerotier-one to verify if the
service is running. A successful output looks like this:
1 |
|
1 |
|
200 join ok prompt will appear.
You can then run sudo zerotier-cli status to check which
networks you have joined and confirm connection status. After joining,
information formatted as follows should be displayed:
1 |
|
At this point, the client device has joined the network, but the administrator has not yet authorized its connection. The authorization procedure is detailed later in this article.
Start Service and Join Network via GUI on Windows / macOS
Clients on Windows or macOS provide a GUI, making joining straightforward. After installation, launch ZeroTier One and right-click its system tray / menu bar icon (personal info redacted):
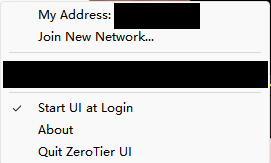
Click Join New Network, and paste your Network ID into
the pop-up window.
2. Mobile
Android devices can download the app from the official website or Google Play Store. Apple devices may require an App Store account from an available region. Once downloaded, open the app and tap the + icon in the top right corner to add a new virtual LAN connection, which will bring up the following screen:
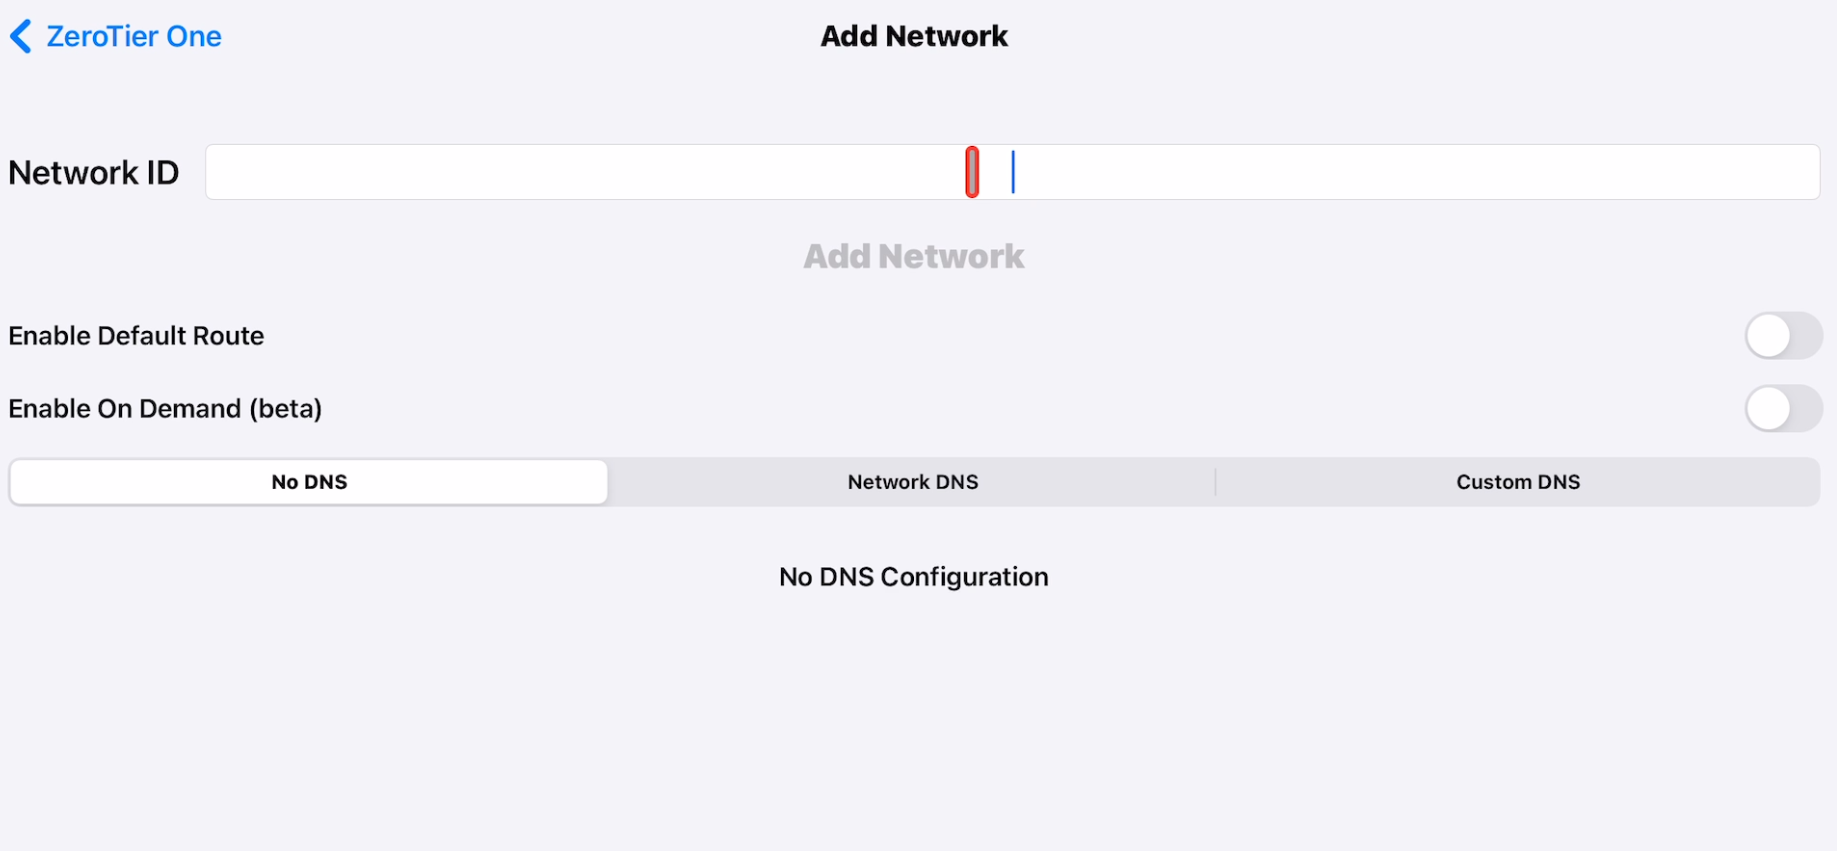
Paste your Network ID into the NetworkID field.
After joining, return to the main screen, where the corresponding network entry will appear with a toggle button on the right. When toggled on, the device will typically prompt you to authorize VPN configuration; grant permission. Once enabled, the device will connect to the network. If the VPN icon appears in your device's status bar, it means the connection attempt was initiated! However, since we haven't authorized the device on the subnet yet, the actual connection won't fully establish until authorized. Next, I will explain how to authorize devices to successfully connect to the newly created virtual LAN.
Authorizing Devices
After a device requests to join the network, you must approve access
in the admin dashboard to enable the device connection within the
network. Return to the management page of your network; under the
Members section below, you will see the devices requesting
to join:
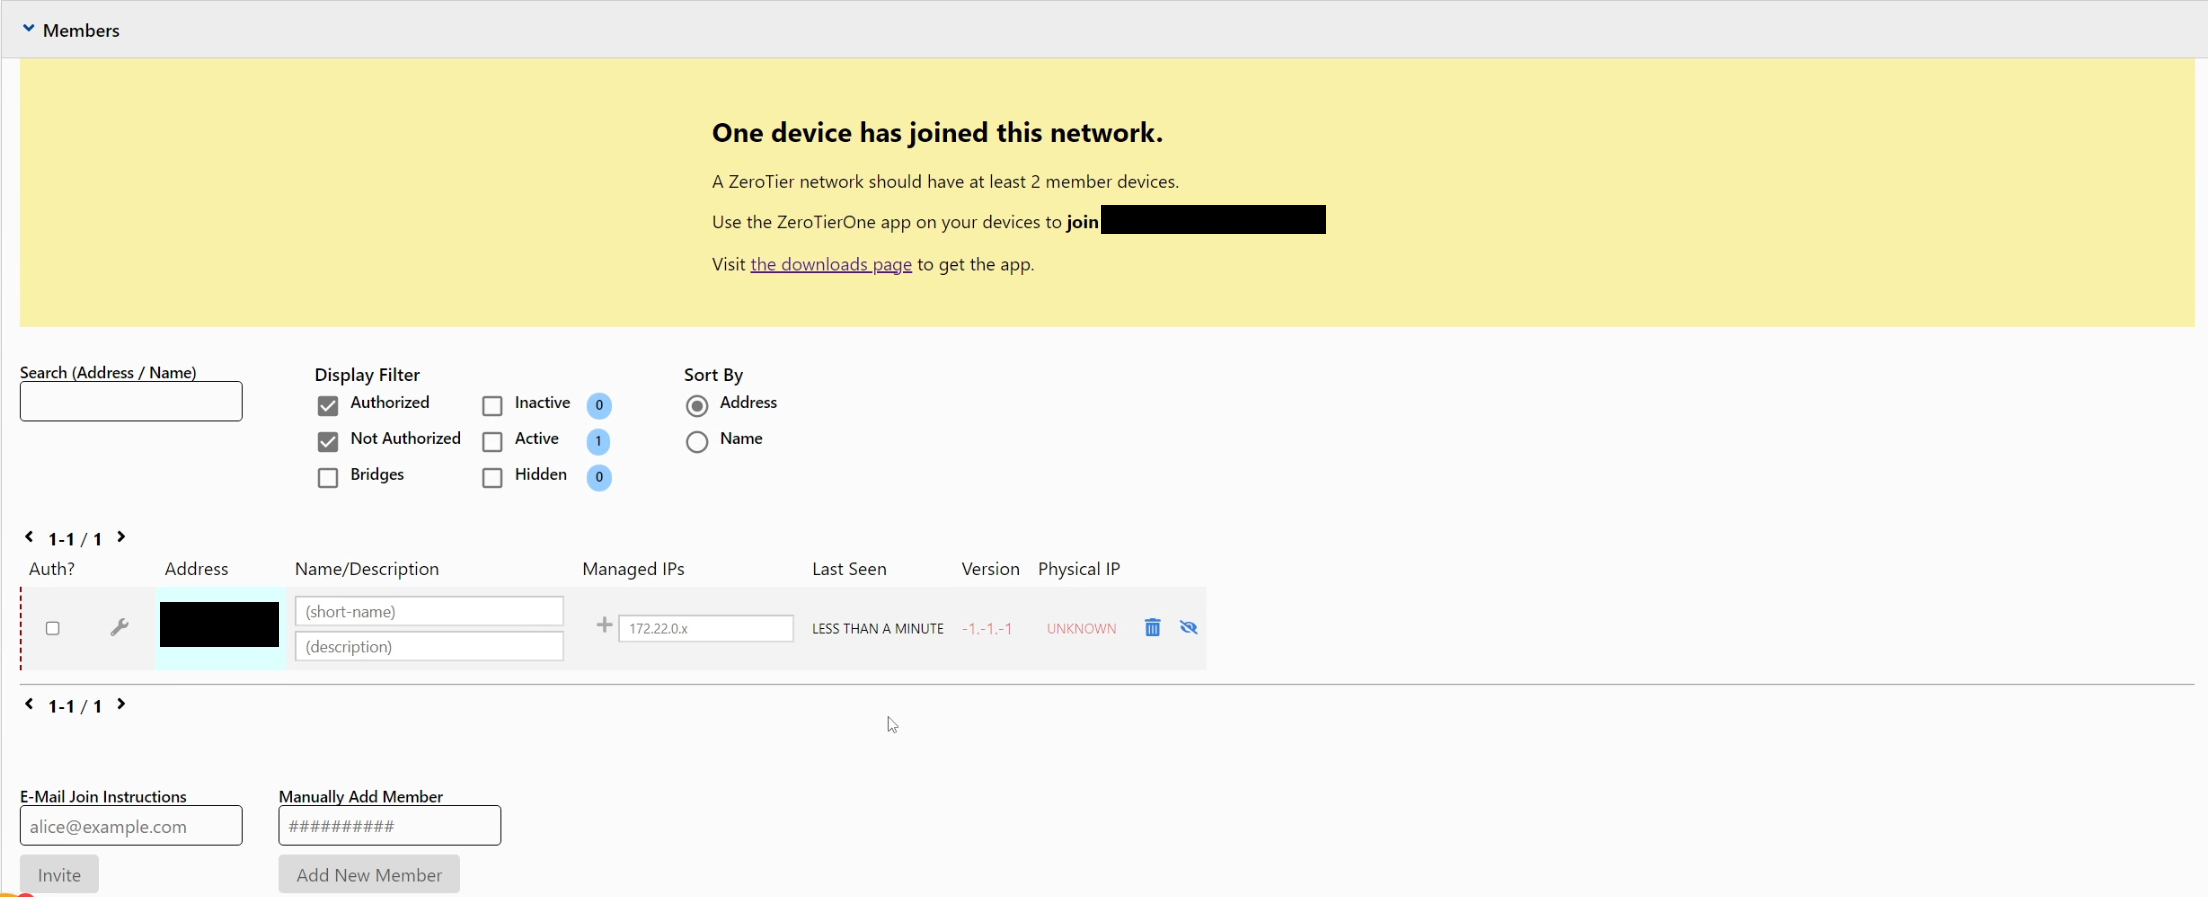
The Address column displays the device's Node ID / physical address.
You can run sudo zerotier-cli listnetworks in the terminal
or check the GUI client to find the current device's Node ID to match
the target device.
In front of each unauthorized device, there is an Auth?
checkbox. Check this box to authorize the corresponding device to join
the virtual network. You can also assign a name and a static IPv4
address within the virtual network for each device; it is recommended to
set unique names and addresses for better management. At this stage, the
basic virtual network connection is established, and you can test
connectivity by pinging between the assigned IP addresses within the
network.
Remote Development Using Mobile SSH Tools or Terminal Emulators
Since I have recently been using the Neovim editor for development, I connect directly using a terminal emulator. Of course, there are plenty of editors available on mobile platforms for remote connections; choose whatever fits your workflow best. Below are demonstrations using the Termius terminal emulator and Code editor for remote connection, both tested on iPadOS.
Termius in Action
Adding a connection
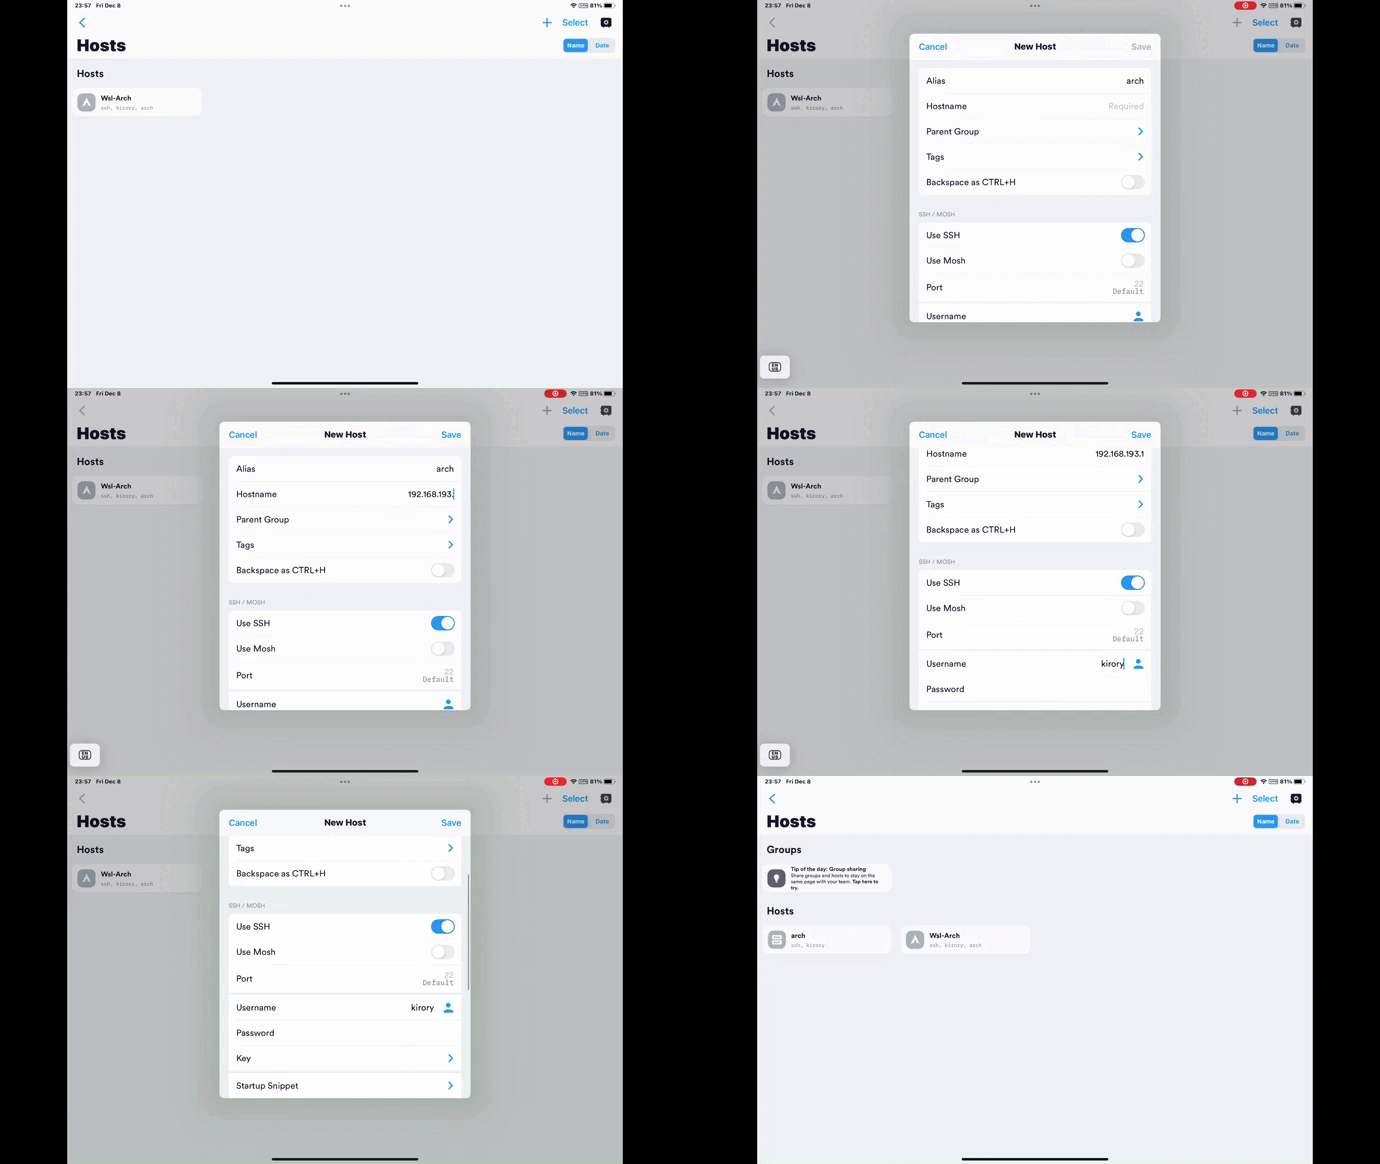
Workflow demonstration
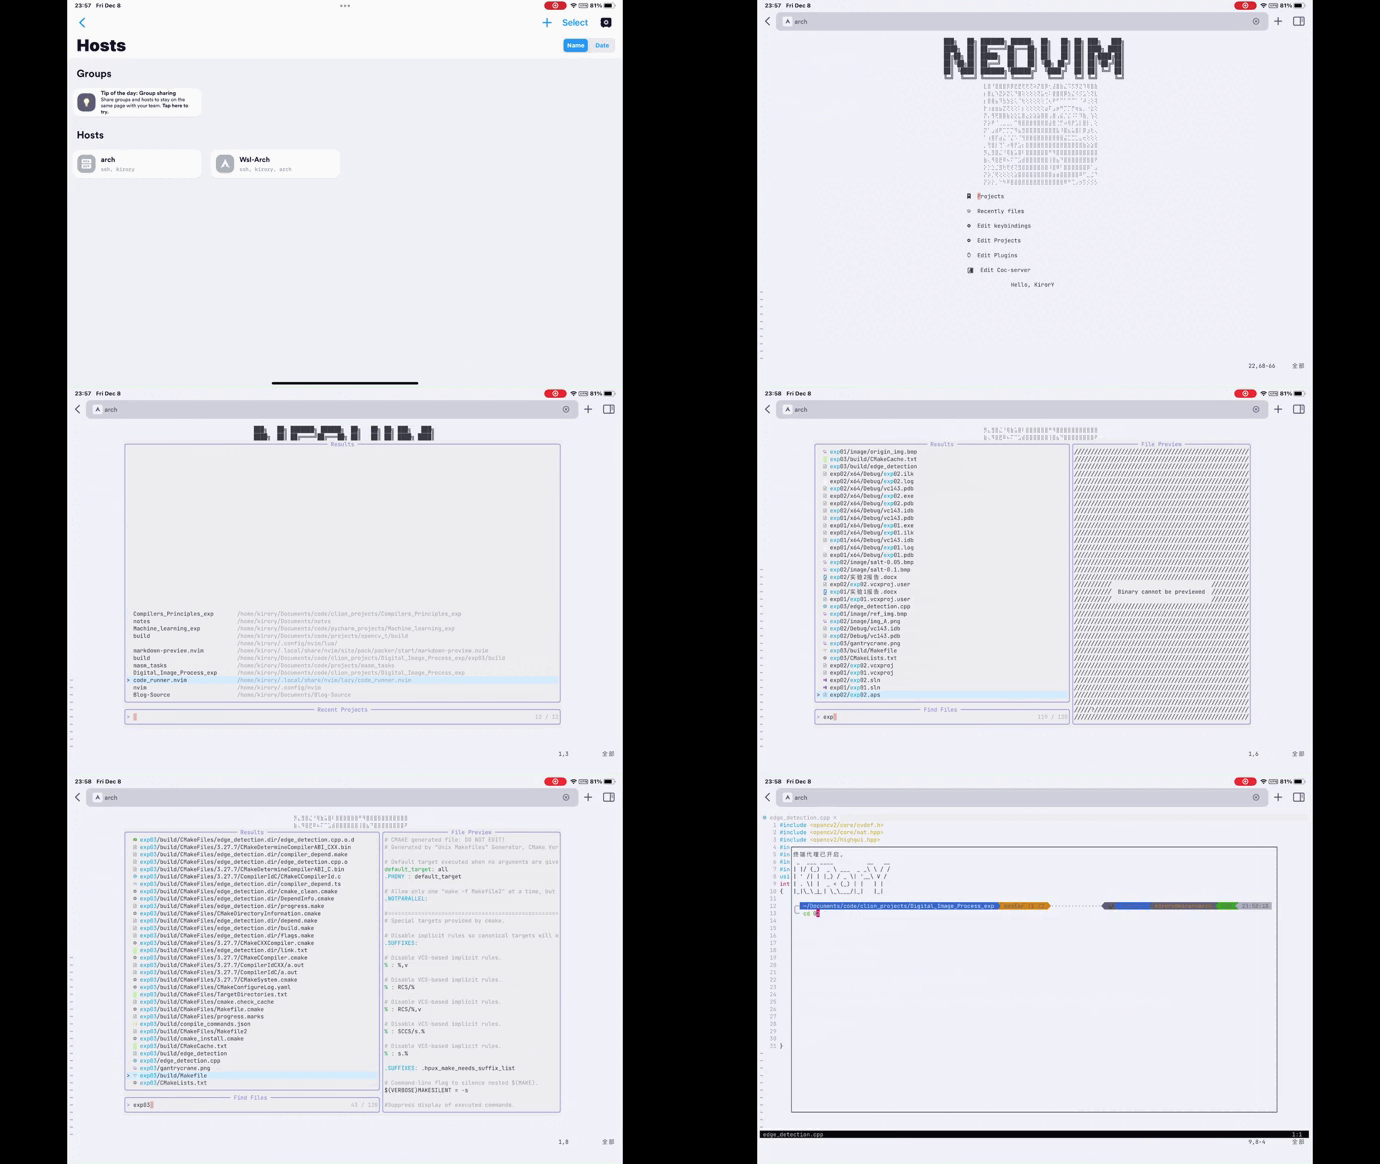
Code in Action
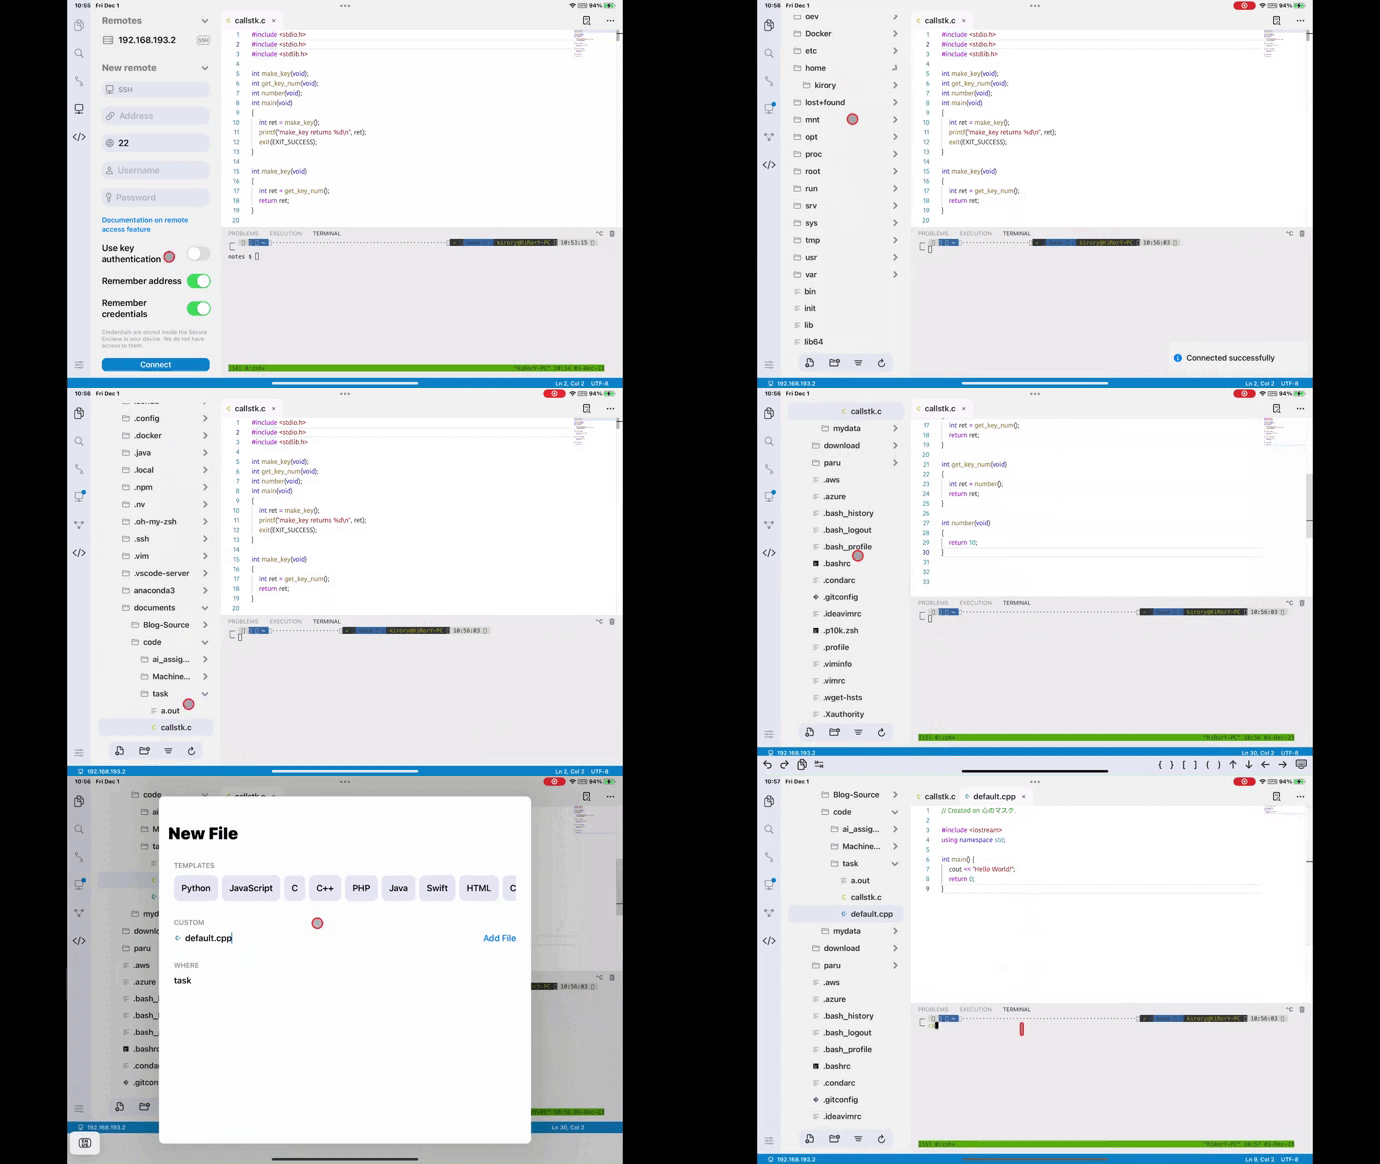
Turn your mobile device into a real productivity powerhouse!